Thursday, July 21, 2011

For the Kids Friday #20


We've hit 1000 followers!!!  Thank you all SO much for helping Sun Scholars reach this awesome achievement in such a short time.  I am thrilled to have you all here, and I absolutely love sharing with you!

We are enjoying a week's vacation in Canada with Gramma and Papa before we head to China.  I am not sure how much I will be able to post over the next couple of weeks, but I will do the best that I can.  In the mean time, check out these awesome posts from last weeks party... and share what you've been up to since then!  I can't wait to see all of your summer fun!

Thanks to all of you who joined in the fun with last week's party!  Here are some of my favorites from last week.  All of these awesome posts will be added to my A++ Features, found on the tab above.

Featured below?
If so... grab this button to share on your blog!


Sun Scholars


Beach Blanket Tic-Tac-Toe 
at Polka Dots on Parade

Kindergarten Countdown
at Dixie Delights

Mr. Shark Alphabet Chomper Game
at I <3 Crafty Things

Brown Baggin' It: A Touch-and-Feel Game
at Relentlessly Fun, Deceptively Educational

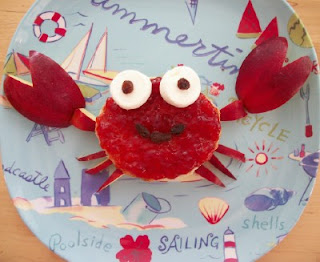
The Crabby Lunch
at Kitchen Fun With My 3 Sons

A Few Summer Fun Activities
at Simple As That


Now... show me what you've got!


This Week\


1)  I would LOVE for you to first be a follower of my blog.  (And why wouldn't you want to be?!)

2)  Grab my For the Kids Fridays Button and place it somewhere on your blog.  Be sure to link back to me!

3)  Link up as many KID-RELATED activities, games, recipes, parties, gifts, clothing you've created, crafts, traditions, lessons, and so on... that you would like to share.  Please add a different link each week.  They can be old or new... this is just a place to share ideas for our kids to enjoy.  Bonus points to those that serve some educational purpose too!  Link must be to the specific post, and not your general blog page.  Please don't link to your store.

4)  Share the love and comment on at least one other link.  Everyone loves to get feedback.


That's it!  Have fun, and thanks so much for participating!


Wednesday, July 20, 2011

1000 Followers

Oh my gosh...

Birthday_clipart_party
I am SO CLOSE to hitting that 1000 mark!

Help me get there!
I will give the person who becomes #1000 AND the person who referred them to my blog my Sun Scholars Summer Program for FREE!

#1000.... send me an e-mail to let me know who referred you!

Thanks to all of my loyal fans and followers!
oxoxoxo

PS.  This is also cause for some real celebration.  Once my life settles down a bit (due to our move overseas happening THIS WEEKEND) then I am looking forward to putting together a great 1000 Follower Giveaway Week.  Stay tuned!

Tuesday, July 19, 2011

Strawberry Pillowcase Dress

This little strawberry sundress
got LOTS of attention around town today.


To pull this idea together, I used THIS FABULOUS tutorial...
found at LBG Studio

.... with my own little embellishments, of course.

Since Vanessa's tutorial is so fabulous, I'm going to refer you to her blog for the details on making these adorable little pillowcase dresses.  She even offers a printable pattern!

However, here are the things I did differently to create my version.

Supplies I Used:
- Red Cotton Fabric
- Green Cotton Fabric
- Thread, red & green
- Green Ribbon, 3/4" thick
- Black Knit Fabric

Directions:
For my dress, I wanted to have green on the top, and red on the bottom, so I cut the fabric as shown below.  (I didn't use the pattern, but was doing it freehand.  I later went in and made my arm curves deeper then you see below.)

Next, sew your green to the red fabric so you have your front and back pieces of your dress.

For the rest of the dress I followed Vanessa's directions for a Fabric Tie Casing Dress.  I used my green fabric to make bias-tape to edge the arms, and used the green ribbon to thread through the casing.


To embellish...

1) I added a ruffle of green ribbon between the red and green fabric.  I did this by gathering the ribbon with a hand-stitch and pinning it in place.  I then stitched the ribbon down the center onto the dress, and removed my hand stitching.

2) Last, I added the seeds.  I used the same technique I used for my watermelon skirt below.  I've copied and pasted those instructions here, so ignore the fact that I'm showing you a skirt here and not the Strawberry dress.  :)

I found a cup in the cupboard and used it to create a pattern.  I then cut a stack of circles from my black jersey knit.  I think I used 20 for the smaller skirt.  I am not sure yet, but I may add a third row of seeds to the larger skirt (haven't finished it yet).

To create your "seeds" you have to fold each circle as I have down in the photos below...


Fold the circle in half.... then fold into thirds by folding one third over the front, and the other side behind, forming a little seed-looking shape.  Pin each "seed" onto your skirt in an arrangement that is pleasing to you.  You may chose to add them randomly.  I liked the patterned look, so I went with that.


Sorry for the crummy photos.  The bad lighting and red fabric really didn't work in my favor here.  Next, sew on each of your seeds by adding a stitch, back and forth a couple of times, to the top of each "seed".

I went from "seed" to "seed" without stopping, and cut all of my threads between at the end.  That saved a bit of time.

And here is the finished dress!


Happy Sewing!

Sunday, July 17, 2011

Party Part 2: Rainbow Cake

My dad had made me an amazing, rainbow cake when I turned 8.
For my daughter's 8th birthday I wanted to do the same.

Here is what I ended up with...

I can't say that I followed any real instructions.
I didn't make any of it from scratch, or use any fancy pastry techniques (I don't think I know any as it is!)
I did find some great instructions HERE...

For my cake, I used the following:
- 3 boxes of White Cake Mix
- 4 containers of White Frosting
- Food Coloring
- Mini M&M's (to decorate)

I like how the instructions from The Idea Room link above suggest using two boxes of cake mix.  As you can see, this cake was HUGE!  I mean, not just huge, but a TOWER!  I had a heck of a time cutting it because it was so tall.  And, of course, each child wanted the complete rainbow.... of course!!


I think that using two cake mixes as opposed to three will get you a much easier cake to manage.  The cake was a huge hit with the kids, and it really wasn't too hard to put together.  The worst part was waiting for each layer to cool enough so I could remove them from the pan without them breaking, so I could quickly throw the next set of layers into the oven.

I also used regular food coloring (but lots of it) to tint the cake batter.  The baked cake color will be very close to the color you get with the batter, so color each layer to your desired intensity.

And.... don't forget to add some candles!

I think all cakes should be this fun!


Thursday, July 14, 2011

For the Kids Friday #19


Ok... this is it!  Our house is packed up and we're ready to start a new chapter in our lives.  A week with our family in Canada, then we're off to China for three years.  I still don't think it has really sunk in with me yet.  Needless to say, my life has been crazy, and will be turned up-side down for a few weeks to come.  So bare with me :)  With that said, I'm always up for a party... and I can't wait to see what you've got for me this week!

Thanks to all of you who joined in the fun with last week's party!  I'm sharing some of my favorite posts below.  All of these awesome posts will be added to my A++ Features, found on the tab above.  Thanks to all of you who linked up to the last party!

Featured below?
If so... grab this button to share on your blog!


Sun Scholars


Kool-Aid Kool Dough
at Homespun with Love

Flower Prints
at The Muddy Princess

Glow-in-the-Dark Firefly Jar
at Come Together Kids

Something Fun to Do This Summer - Geocaching!
at Ready or Not

DSC04091
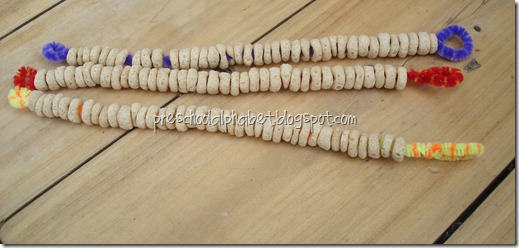
Cheerio Bird Feeders
at Preschool Alphabet

Ready2Read Level 1: Unit 6
at The Moffatt Girls

Humane society diy cat toy finished catnip fish from baby socks
DIY Cat Toys
at Scout Mom

Road Trip Bingo
at Housing a Forest

Dino Eggs
at Snails and Puppy Dog Tails


Now... onto the party!


This Week\


1)  I would LOVE for you to first be a follower of my blog.  (And why wouldn't you want to be?!)

2)  Grab my For the Kids Fridays Button and place it somewhere on your blog.  Be sure to link back to me!

3)  Link up as many KID-RELATED activities, games, recipes, parties, gifts, clothing you've created, crafts, traditions, lessons, and so on... that you would like to share.  Please add a different link each week.  They can be old or new... this is just a place to share ideas for our kids to enjoy.  Bonus points to those that serve some educational purpose too!  Link must be to the specific post, and not your general blog page.  Please don't link to your store.

4)  Share the love and comment on at least one other link.  Everyone loves to get feedback.


That's it!  Have fun, and thanks so much for participating!